If you want to know how to fix sticky keyboard keys, begin by working out whether the key is physically catching or whether the computer is only behaving as though it is. A key that feels gummy, comes back slowly, sits lower than its neighbours, or stays pressed down needs a careful cleaning or repair. A key that moves normally but types twice, ignores fast taps, or changes shortcuts may be a settings, software, or switch-contact issue instead.
For most desktop keyboards with a single mildly sticky key, the safe first fix is simple: disconnect it, remove loose debris with gentle upside-down tapping and controlled compressed air, clean only the accessible edges with a barely damp lint-free swab or cloth, allow it to dry fully, then test it. Do not start by prying off a laptop key or pouring cleaner into a switch.
Quick diagnosis: is the key physically sticky?
Before cleaning, open the free Online Keyboard Tester and press the affected key 10–20 times. Then type a sentence in a plain text editor.
| What you notice | Likely issue | Best next step |
|---|---|---|
| The key feels gummy, catches, or rises slowly | Debris, dried residue, a binding keycap, or stabilizer problem | Follow the external cleaning steps below. |
| The key feels normal but repeats characters | Switch chatter, a software setting, or an app problem | Test in another app; see the settings section before cleaning. |
| The key works only when pressed hard or at one edge | Misaligned keycap, large-key stabilizer, or worn mechanism | Stop forcing it; use the model-specific repair path. |
| Several keys in one area are sticky after a spill | Liquid contamination inside the keyboard | Disconnect power and arrange appropriate service. |
| The on-screen tester detects every press but one app does not | App shortcut, key binding, overlay, or remapping software | Reset the affected app’s controls and close input utilities. |
An online tester confirms whether the computer receives the key press; it cannot see hidden liquid damage or guarantee an intermittent fault will not return. Test at normal typing force—not by hitting the key harder.
Stop after a fresh liquid spill. Shut down a laptop, unplug the charger, disconnect an external keyboard, and remove batteries only if the product permits it. Do not keep powering it on to “see if it still works.” Coffee, soda, juice, milk, and other liquids can leave residue and damage electronics internally. A laptop or a keyboard with liquid inside is a service case, not a quick-cleaning project.
What you need—and what to avoid
For a routine surface clean, gather:
- A soft, lint-free cloth
- Cotton swabs
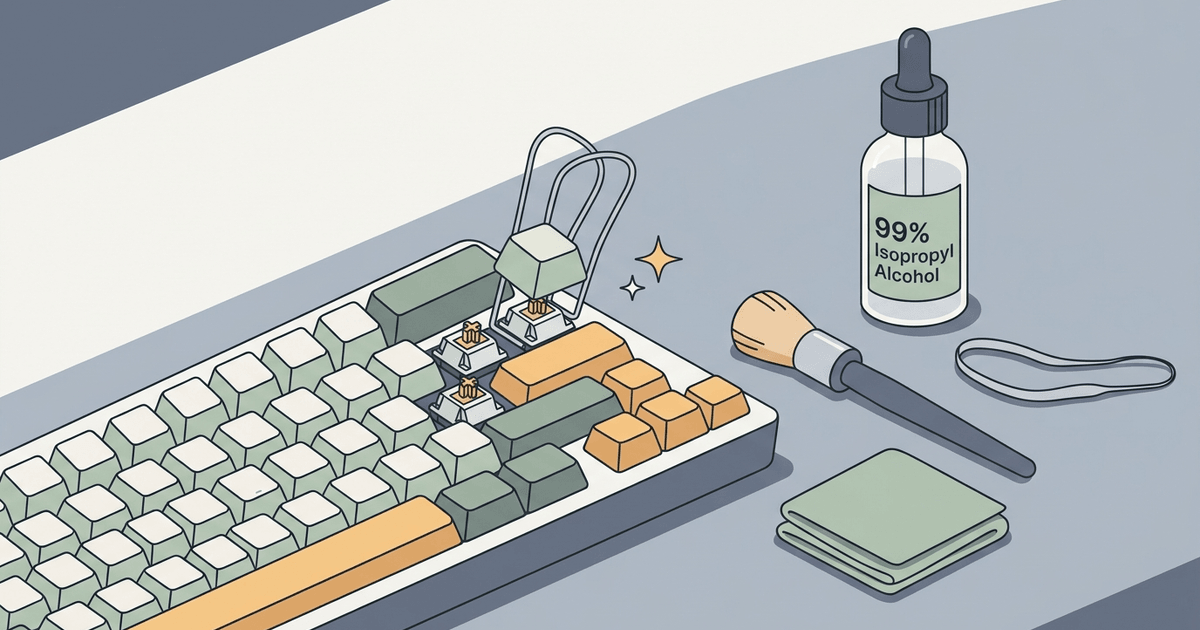
- A soft brush, such as a clean camera or makeup brush
- A can of compressed air, used according to its instructions
- If the manufacturer permits it, isopropyl alcohol on a cloth or swab—never poured or sprayed into the keyboard
Avoid kitchen towels that shed lint, abrasive tools, bleach, acetone, hand sanitizer, household spray cleaners, cooking oils, and WD-40. Never use a heat gun or hair dryer on a keyboard. The goal is to lift grime without putting liquid, heat, residue, or leverage where it does not belong.
How to fix sticky keyboard keys: the safe 5-minute method
This method is appropriate for loose dust, crumbs, and light residue on an external desktop keyboard. If a manufacturer gives different care instructions, use those instead.
1. Disconnect power
Unplug a wired keyboard. Switch off a wireless keyboard and remove user-replaceable batteries if the manual allows it. For a laptop, shut it down and disconnect its charger. This prevents accidental input and keeps cleaner away from live electronics.
2. Let loose debris fall out
Hold an external keyboard upside down over a clean surface and tap it gently. Do not bang it on the desk. Microsoft recommends this approach before using compressed air to clear debris between keys.
3. Use short, controlled bursts of air
Keep the compressed-air can upright. Aim short bursts around the affected key’s perimeter rather than forcing the straw under the keycap. Work from a few directions while the keyboard is angled so debris can escape.
Do not use a household vacuum with a hard nozzle around a keycap; static, suction, or an impact can damage delicate parts. A soft brush is a better first choice for surface dust.
4. Clean accessible residue—not the switch interior
Lightly moisten a lint-free cloth or cotton swab. It should be damp enough to pick up grime, not wet enough to drip. Hold the key down and wipe the exposed edge of the keycap and the surrounding surface. Use a dry swab afterward to lift any loosened residue.
Do not squirt alcohol, contact cleaner, water, or lubricant into an assembled switch, membrane, or laptop keyboard. A common online “fix” is to flood a sticky switch and keep pressing it; that can spread contamination deeper, affect plastics or coatings, and make later service harder.
5. Let it dry, then test again
Keep the device disconnected until the cleaned area is completely dry. There is no reliable universal waiting time: it depends on the cleaner, amount used, ventilation, and whether moisture entered an opening. Once it is dry, reconnect it and test the key online at normal pressure 20 times.
If it now moves freely and registers once per press, the problem was likely surface debris or residue. If it still catches, do not repeat the same cleaning more aggressively—use the right path below.
Choose the right fix for your keyboard type
External mechanical keyboards
Many full-height mechanical keyboards allow keycap removal, but this is not universal. Check the keyboard maker’s manual and warranty first.
If your model supports removing the affected keycap:
- Take a photo of the keyboard and the underside of the keycap before removal.
- Use a proper wire keycap puller and lift straight up with steady, light force.
- Brush away debris from the accessible plate and keycap underside. Clean the keycap itself only as the manufacturer permits; keep moisture away from the switch and PCB.
- Inspect for an obviously cracked stem, dislodged stabilizer wire, or bent clip. Do not bend parts back by force.
- Reinstall the keycap exactly as the manufacturer shows, then test it.
For a hot-swappable board, a still-sticky central switch may need a compatible replacement. Soldered, optical, Hall-effect, low-profile, and sealed keyboards need their exact service procedure or a qualified technician. A stubborn key does not prove that a switch needs lubrication; adding lubricant to a dirty or unknown mechanism can make it worse.
Large keys: spacebar, Shift, Enter, and Backspace
Large keys often have a stabilizer wire or additional supports. If a spacebar or Enter key works at the centre but sticks at one side, the keycap or stabilizer is likely binding. Do not keep pressing harder and do not yank the keycap off.
Use the keyboard maker’s instructions to inspect or reseat the stabilizer. If no official instructions exist, a repair shop is the safer choice. HP, for example, notes that long laptop keys can use a support rod that must be correctly seated before the key is replaced; the exact clips and rod layout vary by model.
Standard membrane and office keyboards
Membrane keyboards use a rubber dome over a flexible circuit layer. Surface cleaning can resolve crumbs or residue around the keycap, but a torn dome, damaged membrane trace, or residue below the membrane is not a reliable DIY spot repair.
If a single key remains sticky after safe exterior cleaning and the fault follows the keyboard to another computer, replacement is often more practical than opening a sealed membrane board. Do not assume every office keyboard keycap can be removed safely.
Laptop keyboards
Laptop keys use thin, model-specific scissor or butterfly mechanisms. Their retaining clips can break easily, and a replacement keycap may not solve damage below it.
For a sticky laptop key:
- Shut down the laptop and disconnect the charger.
- Look up the exact model’s official support instructions before lifting any keycap.
- Start with dry cleaning only, such as the model-approved compressed-air method.
- If the key is crooked, loose, sunk, hard to press, or still sticky, book service instead of prying it upward.
If the laptop is under warranty, contact the manufacturer before attempting keycap removal. HP explicitly cautions against removing a notebook key under warranty, and Apple publishes a compressed-air-only procedure for supported MacBook models with unresponsive or abnormal-feeling keys.
MacBook and Apple keyboards
For compatible MacBook and MacBook Pro models, Apple’s published process uses compressed air: hold the notebook at about a 75-degree angle, spray left to right, then repeat with the notebook turned onto each side. Keep the can upright and the straw about half an inch from the keyboard. If the key remains unresponsive, Apple directs users to service.
Do not apply a desktop mechanical-keyboard repair video to a MacBook, Magic Keyboard, or other low-profile Apple keyboard. Their scissor mechanisms and long-key supports are different and easy to damage.
When it is not a physical sticky-key problem
Windows Sticky Keys is an accessibility feature for modifier-key combinations; it does not make a plastic keycap physically stick. If your key moves normally but the computer makes beeps, modifiers appear held, or fast presses are ignored, check settings before disassembling anything:
- Windows: Open Settings > Accessibility > Keyboard. Turn off Sticky Keys if it was enabled unintentionally. Also check Filter Keys, which can ignore brief or repeated keystrokes.
- macOS: Open System Settings > Accessibility > Keyboard. Check Sticky Keys and Slow Keys. Slow Keys adds a delay before macOS accepts a press.
- Any computer: Quit macro tools, remapping software, game overlays, and remote-desktop apps, then test in a plain text editor and another browser.
If one key types twice while it feels physically normal, see our guide to mechanical keyboard chattering. If the tester sees normal input but a game does not, reset that game’s key binding instead of cleaning the keyboard again.
When to repair, replace, or get help
Stop DIY cleaning and seek service when:
- A spill reached the keyboard or laptop internally.
- The keycap, hinge, stabilizer, or switch is visibly cracked, loose, or bent.
- A laptop key will not sit level or needs excessive force.
- Several nearby keys fail, especially in a row or after a spill.
- The key remains sticky after a careful external clean and a manufacturer-approved keycap inspection.
- The keyboard is under warranty and opening it could affect coverage.
For an external keyboard, test it on another device before replacing it. If the same key fails there after safe cleaning, the keyboard hardware is the likely source. For a laptop, a working external USB keyboard is a practical temporary workaround while you arrange repair.
Prevent sticky keys from coming back
- Keep drinks away from the keyboard and clean spills immediately from the exterior after disconnecting power.
- Brush away surface dust regularly and use a fitted cover only when the keyboard is dry and not in use.
- Wash hands before using light-coloured keycaps; oil and residue hold dust around the key edges.
- Do not use lubricants or cleaning liquids as routine maintenance unless the manufacturer specifies them.
- Test a key promptly when it first feels different. A small debris problem is easier to isolate than a dried, widespread spill.
Frequently Asked Questions
What is the fastest way to fix a sticky keyboard key?
Disconnect the keyboard, turn an external board upside down and tap it gently, clear loose debris with short bursts of compressed air, then wipe only accessible edges with a barely damp lint-free swab or cloth. Let it dry completely and test the key. Do not pry a laptop keycap or pour cleaner into a keyboard as a “quick” fix.
Can I use rubbing alcohol to fix sticky keyboard keys?
Use it only when the device maker permits it, and apply a small amount to a cloth or swab—not directly into the keyboard. For Microsoft accessories, Microsoft specifies an isopropyl-alcohol solution of 70% or less on a soft, lint-free cloth. Do not flood a switch, membrane, laptop keyboard, or PCB; their materials and coatings vary.
Why is my keyboard key still sticky after cleaning?
The residue may be below the accessible surface, or the keycap, stabilizer, switch, rubber dome, or laptop scissor mechanism may be damaged. If a key works only from one side, sits crooked, or needs extra force after an external clean, stop forcing it and follow the exact model repair procedure or use a technician.
Can I remove a sticky laptop key to clean it?
Only if the exact laptop model’s manufacturer instructions say it is safe. Laptop clips, hinges, and support rods are fragile and differ by model. Do not remove a key while the laptop is under warranty unless the manufacturer instructs you to do so.
Why does Windows say Sticky Keys when my key is physically stuck?
They are different problems. Sticky Keys is a Windows accessibility setting for modifier-key combinations. A physically sticky key feels like it catches or does not rebound. Turn off the accessibility setting if it was enabled accidentally, but clean or repair a key that is mechanically binding.
Should I use WD-40, cooking oil, or a hair dryer on sticky keys?
No. These can leave residue, introduce heat, or damage materials and coatings. Use dry debris removal first, then only a manufacturer-approved cleaning method with the keyboard disconnected.
Bottom line
The best way to fix sticky keyboard keys is to match the remedy to the symptom. Start with a safe external clean for crumbs and light residue, use settings checks only when the key feels mechanically normal, and treat laptop mechanisms, large-key stabilizers, and liquid spills with extra caution. After each step, test your keyboard so you know whether the fix worked before doing anything more invasive.